
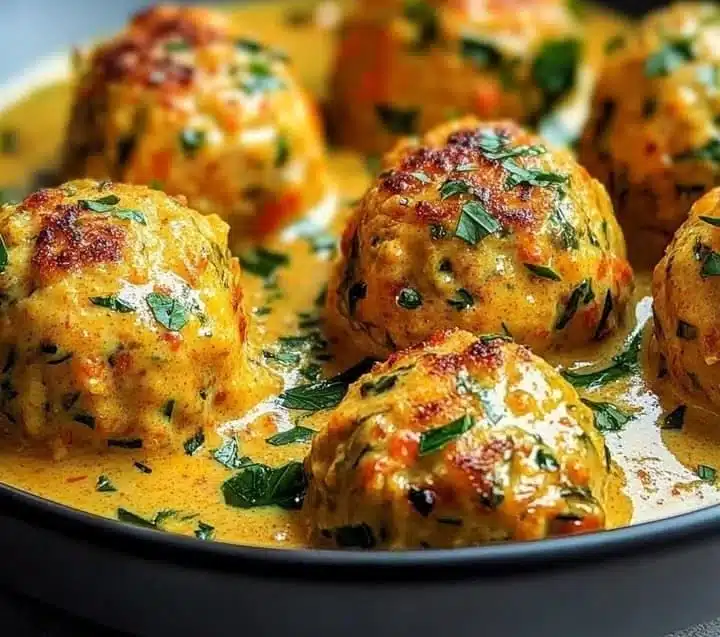
How to make Gluten-Free Chickpea and Carrot Balls in Coconut Curry Sauce
Ingredients :
-
For the Chickpea and Carrot Balls:
- 1 can chickpeas (15 oz), drained and rinsed
- 1 cup grated carrots
- 1/2 cup gluten-free breadcrumbs
- 1/4 cup finely chopped onion
- 2 cloves garlic, minced
- 1 tsp ground cumin
- 1 tsp ground coriander
- 1/2 tsp turmeric powder
- Salt and pepper to taste
- 1 tbsp olive oil (for frying)
-
For the Coconut Curry Sauce:
- 1 can coconut milk (13.5 oz)
- 1 cup vegetable broth
- 1 tbsp curry powder
- 1 tsp ginger, grated
- 1 tbsp lime juice
- Salt to taste
- Fresh cilantro for garnish
Directions :
-
Prepare the Chickpea and Carrot Balls:
- In a large bowl, mash the drained chickpeas using a fork or a potato masher, leaving some chunks for texture.
- Add the grated carrots, gluten-free breadcrumbs, chopped onion, minced garlic, ground cumin, ground coriander, turmeric powder, salt, and pepper to the bowl. Mix everything until well combined.
- Form the mixture into small balls, about the size of a golf ball, and set aside.
-
Cook the Balls:
- Heat olive oil in a large skillet over medium heat.
- Add the chickpea and carrot balls in batches and fry them until they are golden brown on all sides. This should take about 5-7 minutes. Remove them from the skillet and place them on a paper towel to absorb any excess oil.
-
Make the Coconut Curry Sauce:
- In the same skillet, add the coconut milk, vegetable broth, curry powder, grated ginger, lime juice, and salt. Stir to combine.
- Simmer the sauce over low heat for about 10 minutes, allowing the flavors to blend.
-
Combine:
- Carefully add the fried chickpea and carrot balls into the coconut curry sauce.
- Gently coat the balls with the sauce and cook for an additional 5 minutes until heated through.
-
Serve:
- Garnish with fresh cilantro and enjoy your Gluten-Free Chickpea and Carrot Balls drizzled with delicious coconut curry sauce.
Why You’ll Love This Gluten-Free Chickpea and Carrot Balls in Coconut Curry Sauce
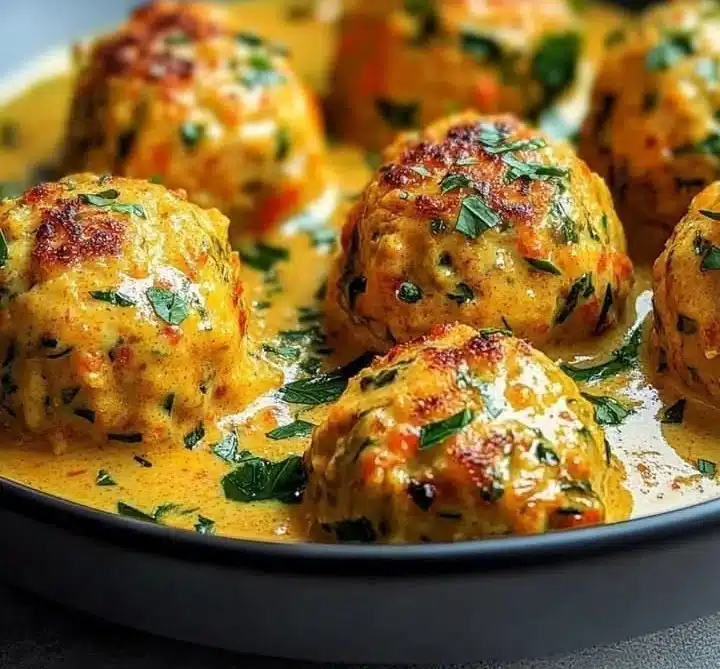
This dish is a perfect blend of flavors and textures that offers comfort food at its best. The chickpea and carrot balls are crispy on the outside and soft on the inside, while the coconut curry sauce adds a creamy and aromatic touch. You will love the combination of spices, which creates a warm and inviting meal. Moreover, it is gluten-free, making it suitable for people with gluten sensitivities.
Nutritional Benefits
Chickpeas are a great source of protein and fiber, helping to keep you full and satisfied. Carrots are packed with vitamins, especially vitamin A, which is essential for good vision. The coconut milk adds healthy fats that are beneficial for heart health. The spices used not only enhance flavor but also provide various health benefits such as anti-inflammatory properties.
What to Serve With Gluten-Free Chickpea and Carrot Balls
This dish pairs wonderfully with steamed rice or quinoa, which can help soak up the coconut curry sauce. You can also serve it with a side of roasted vegetables or a fresh green salad for added crunch and nutrition. A light cucumber or avocado salad can complement the dish nicely as well.
How to Store Gluten-Free Chickpea and Carrot Balls
If you have leftovers, you can store them in an airtight container in the refrigerator for up to 3 days. Reheat the chickpea and carrot balls in a skillet over medium heat until warmed through. The coconut curry sauce can also be stored separately and reheated.
Tips and Mistakes to Avoid
- Do not skip the breadcrumbs: They help bind the chickpea and carrot balls, providing the right texture. If you don’t have gluten-free breadcrumbs, you can make your own by blending gluten-free crackers.
- Don’t overcrowd the pan: When frying the balls, make sure not to overcrowd the skillet. Fry them in batches to ensure even cooking and browning.
- Adjust the spice level: If you prefer a spicier curry, add red chili flakes or fresh chili peppers to the sauce.
Variations
- Add more veggies: Feel free to include other vegetables like zucchini or bell peppers in the chickpea ball mixture for added nutrition.
- Vegan option: This recipe is naturally vegan, but ensure that the vegetable broth used is vegan if you’re strictly following a vegan diet.
- Change the sauce: Experiment with other sauces, such as a tomato-based sauce, if coconut curry isn’t your preference.
FAQs
-
Can I freeze the chickpea and carrot balls?
- Yes, you can freeze the chickpea and carrot balls before frying them. Place them on a baking sheet to freeze, then transfer them to a freezer-safe bag or container. Fry them directly from frozen.
-
Do I need to peel the carrots?
- It is not necessary to peel the carrots, especially if they are organic. Just wash them thoroughly before grating.
-
How can I make the sauce thicker?
- If you want a thicker sauce, you can add a tablespoon of cornstarch mixed with water or let it simmer longer to reduce the liquid content.
This simple yet hearty dish will surely become a favorite in your home. The combination of chickpeas and carrots in a creamy coconut curry sauce not only satisfies your comfort food cravings but also provides plenty of nutrition. Enjoy!
Gluten-Free Chickpea and Carrot Balls in Coconut Curry Sauce
Ingredients
For the Chickpea and Carrot Balls
- 1 can chickpeas (15 oz), drained and rinsed
- 1 cup grated carrots
- 1/2 cup gluten-free breadcrumbs Can make your own with gluten-free crackers
- 1/4 cup finely chopped onion
- 2 cloves garlic, minced
- 1 tsp ground cumin
- 1 tsp ground coriander
- 1/2 tsp turmeric powder
- to taste Salt and pepper
- 1 tbsp olive oil (for frying)
For the Coconut Curry Sauce
- 1 can coconut milk (13.5 oz)
- 1 cup vegetable broth
- 1 tbsp curry powder
- 1 tsp ginger, grated
- 1 tbsp lime juice
- to taste Salt
- to garnish Fresh cilantro
Instructions
Preparation of Chickpea and Carrot Balls
- In a large bowl, mash the drained chickpeas using a fork or a potato masher, leaving some chunks for texture.
- Add the grated carrots, gluten-free breadcrumbs, chopped onion, minced garlic, ground cumin, ground coriander, turmeric powder, salt, and pepper to the bowl. Mix everything until well combined.
- Form the mixture into small balls, about the size of a golf ball, and set aside.
Cooking the Balls
- Heat olive oil in a large skillet over medium heat.
- Add the chickpea and carrot balls in batches and fry them until they are golden brown on all sides, about 5-7 minutes.
- Remove them from the skillet and place them on a paper towel to absorb any excess oil.
Making the Coconut Curry Sauce
- In the same skillet, add the coconut milk, vegetable broth, curry powder, grated ginger, lime juice, and salt. Stir to combine.
- Simmer the sauce over low heat for about 10 minutes, allowing the flavors to blend.
Combining the Dish
- Carefully add the fried chickpea and carrot balls into the coconut curry sauce.
- Gently coat the balls with the sauce and cook for an additional 5 minutes until heated through.
Serving
- Garnish with fresh cilantro and enjoy your Gluten-Free Chickpea and Carrot Balls drizzled with delicious coconut curry sauce.